
Human Resources
View Organization ChartView Position DescriptionChange Home ContactChange Emergency ContactChange Work Space
 View Organization Chart
For All Employees
Overview
This guide outlines the steps for managers and authorized users to quickly access an employee’s emergency contact details within the Workday system.
The process involves two main stages: locating the employee’s profile and navigating to the Contact and Emergency Contacts tabs to view the necessary information.
Before You Start
User will need to have access to Workday and view their employee’s profile.
You will need to have the following information:
• Employee’s First and Last Name
PROCESS
After logging into Workday, you can either:
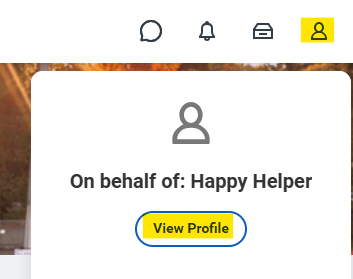
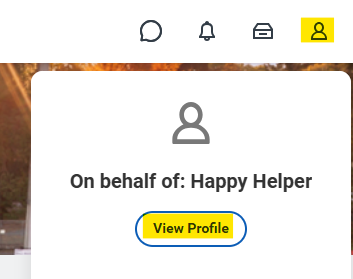
• Go to your profile icon, then click on View Profile. From there, you will want to go to the Team button on the left side of the screen and locate your employee, or
• Type the employee’s name in the search bar at the top of the screen.
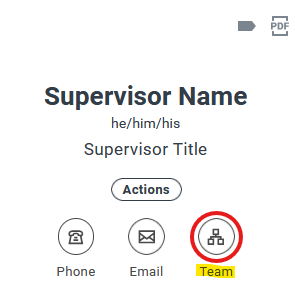
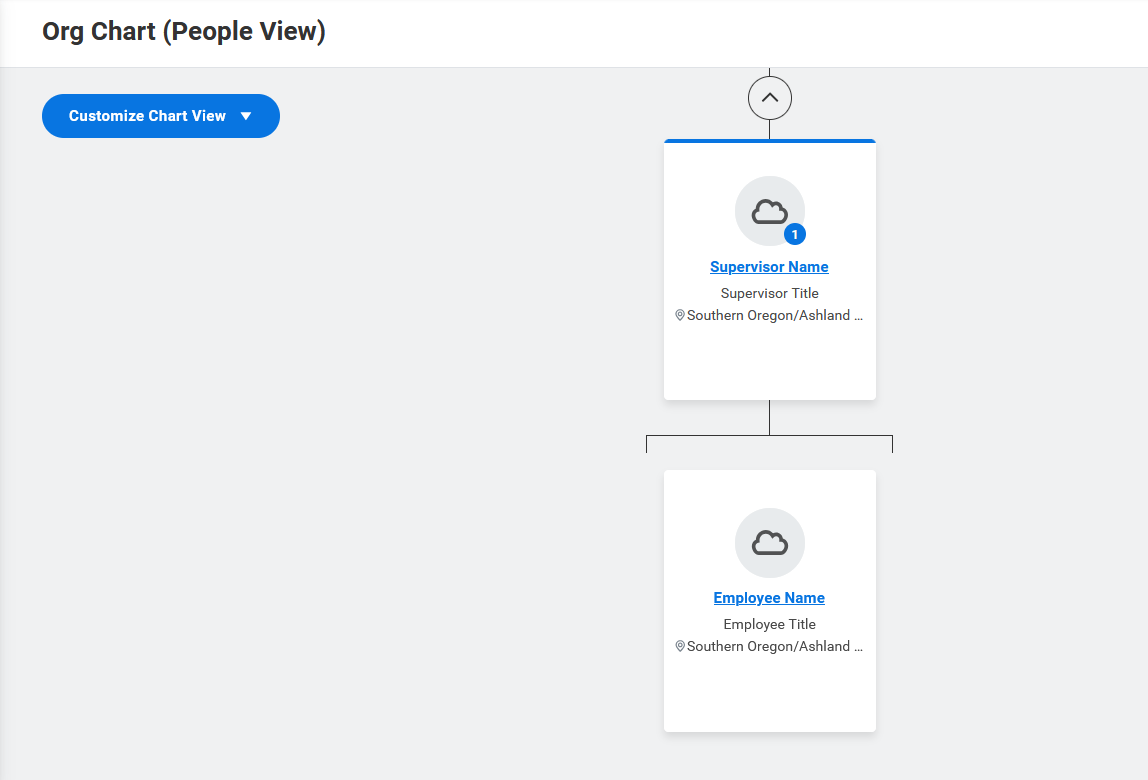
Once selected, you should see the entire organization chart displayed. you can further interact with this screen by scrolling up or down, and navigate using the links on the right-hand side of the screen to explore connecting supervisory organizations.
For Supervisors
Overview
This guide outlines the steps for managers and authorized users to quickly access an employee’s emergency contact details within the Workday system.
The process involves two main stages: locating the employee’s profile and navigating to the Contact and Emergency Contacts tabs to view the necessary information.
Before You Start
User will need to have access to Workday and view their employee’s profile.
You will need to have the following information:
• Name of supervisory organization you would like to locate
PROCESS
After logging into Workday, search View Supervisory Organization in the search bar and click on the corresponding report.
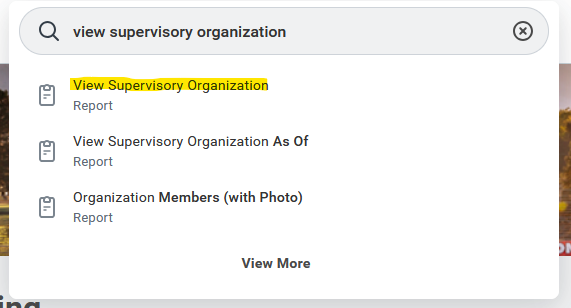
Type in the name of the supervisory organization or the supervisor that manages the supervisory organization and make your selection. Please note that you may see options for Position Management (PM), Job Management (JM), or Non-Compensation (NonComp).
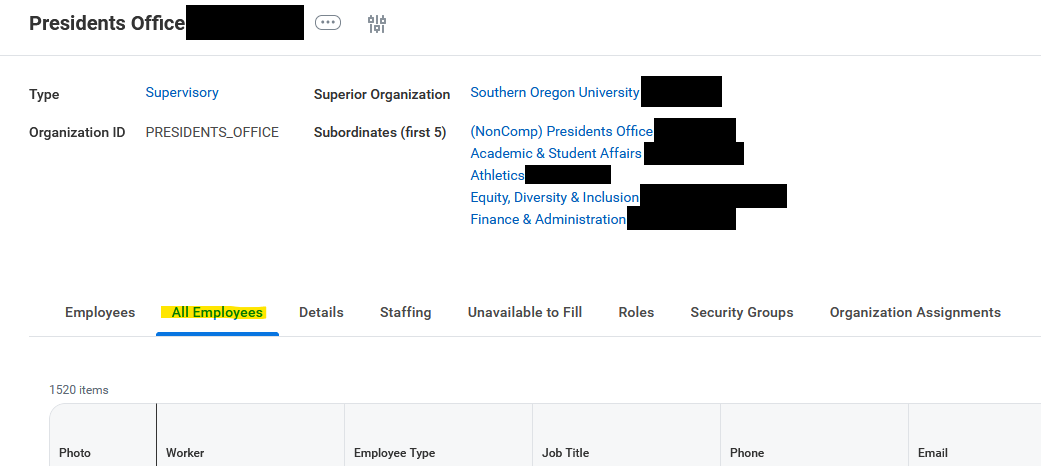
Once the supervisory organization has been selected, a list of employees within the sup org should populate. You will want to navigate to the All Employees tab to see the entire list of every employee within the supervisory organization that may not share the same supervisor.
Another option

View Position Description
For All Employees
Overview
This guide shows you how to access your own or an employee’s position description in Workday.
Before You Start
The user will need to have access to Workday and view their profile.
Please note that only regular, renewable positions can be viewed in Workday using this method. If you are trying to locate the position description for an employee who is fixed term, please check the Documents under the Personal tab or reach out to hrs@sou.edu for further assistance.
Position Management (PM) includes positions categorized as the following;
- Regular
- Renewable
Job Management (JM) includes positions categorized as the following;
- Temporary
- Grant funded
- Non-renewable
- Fixed term
Please note that supervisors can only view position descriptions for employees that they directly supervise.
Process
- After logging into Workday, you can either:
a. Type the employee’s name in the search bar at the top of the screen, or
b. Go to your profile icon, then click on View Profile. From there, you will want to go to the Team button on the left side of the screen and locate your employee.
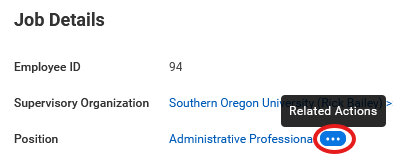
Once you are on the employee profile, click on the 3 dots next to the position under the Job Details on the right-hand side of the screen (this can also be accessed under the Job Details tab on the left-hand menu).
Update Home Contact Information
Overview
This guide shows you how to edit and add home contact information in Workday.
Before You Start
The user will need to have access to Workday and view their profile.
You will need to have the following information:
• Home Address
• Phone Number
• Email Address
PROCESS
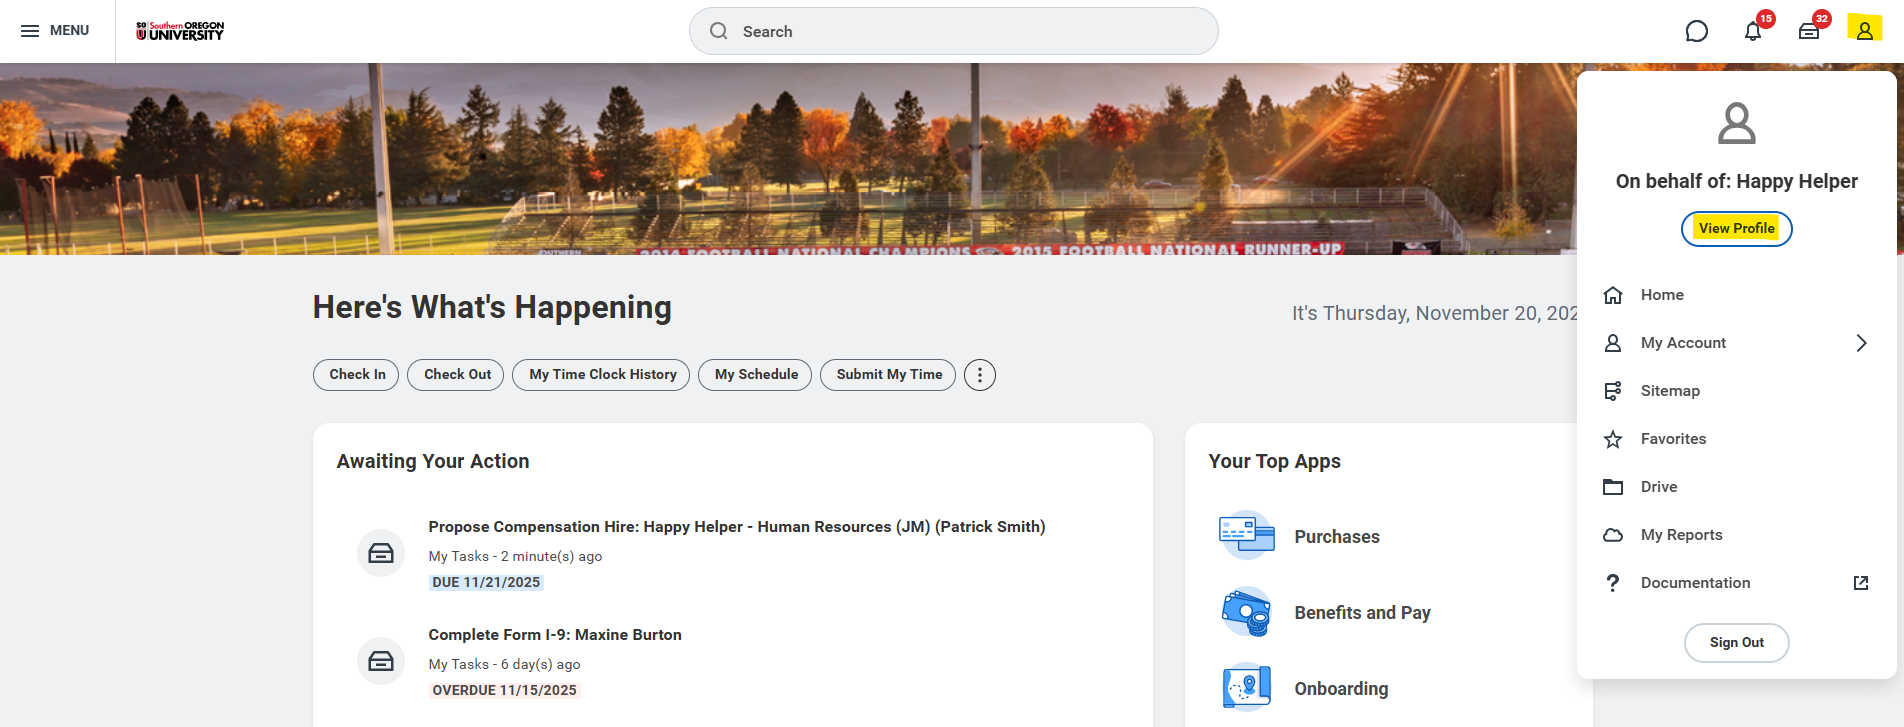
After logging into Workday, click the photo icon at the top right corner, as shown below, then click on the View Profile button:
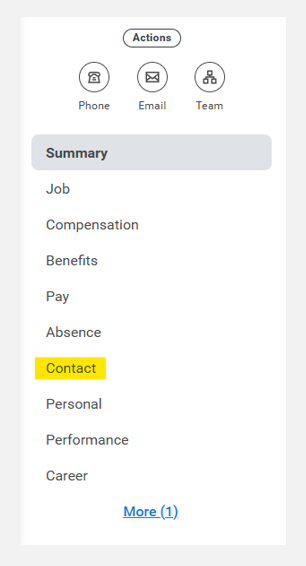
Once you are on your employee profile, click on the Contact on the left-hand side of the screen.
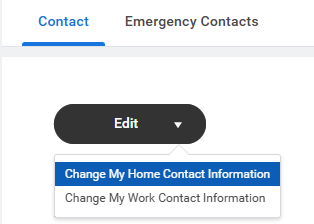
On the Contact page, click the Edit button at the top of the screen and select Change My Home Contact Information.
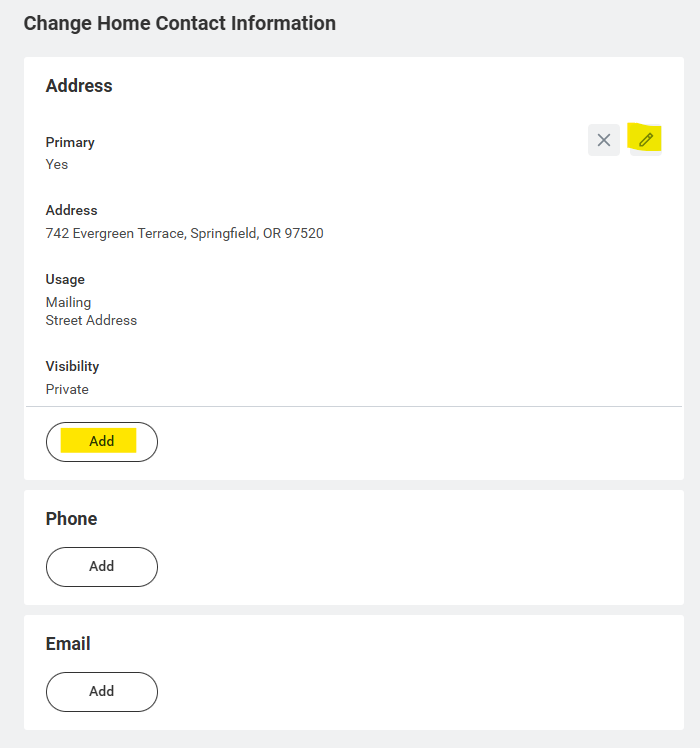
Your Home Contact Information will appear here. Use the pencil icon to edit existing information and Add buttons to add new information in each section section.
Once you have finished adding or changing information, click the Submit button at the bottom of the screen.

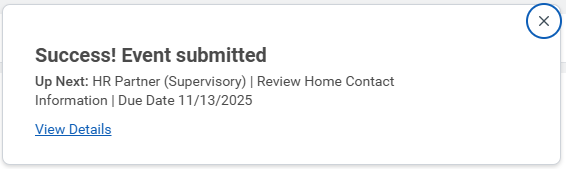
You will receive a message confirming your submission and indicating any remaining approval steps. In most cases, you will need to wait until the change is approved before your new contact information will appear in Workday.
View/Update Emergency Contact Information
For Supervisors
Overview
This guide outlines the steps for managers and authorized users to quickly access an employee’s emergency contact details within the Workday system.
The process involves two main stages: locating the employee’s profile and navigating to the Contact and Emergency Contacts tabs to view the necessary information.
Before You Start
User will need to have access to Workday and view their employee’s profile.
You will need to have the following information:
• Employee’s First and Last Name
PROCESS
After logging into Workday, you can either:
• Go to your profile icon, then click on View Profile. From there, you will want to go to the Team button on the left side of the screen and locate your employee, or
• Type the employee’s name in the search bar at the top of the screen.
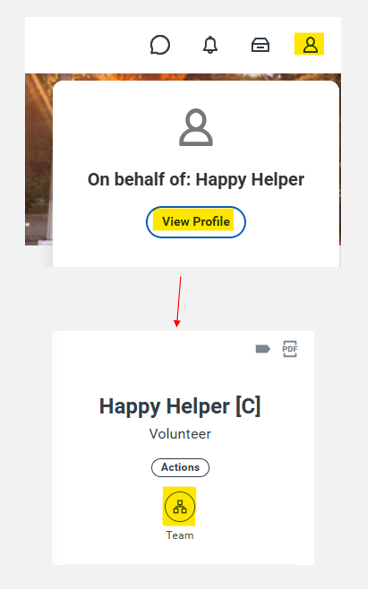
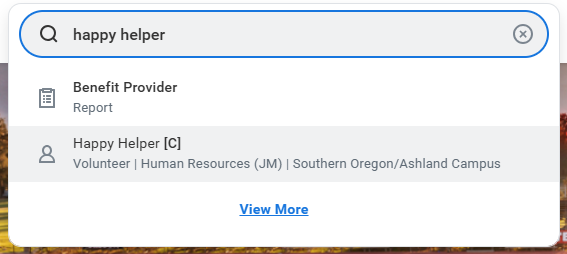
Once you are on the employee profile, click on the Contact tab on the left-hand side of the screen.
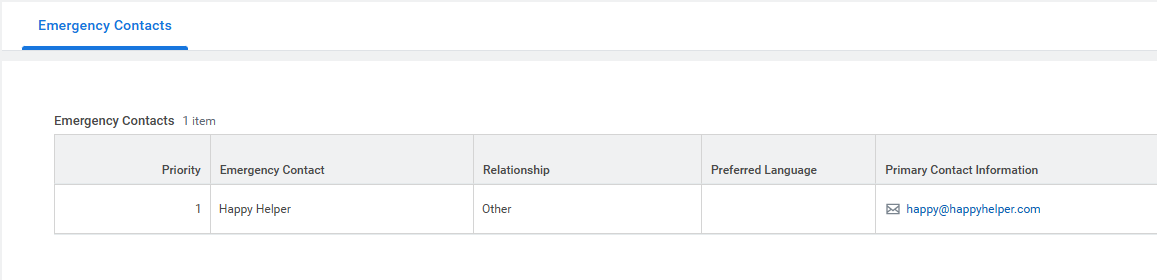
On the Contact page, go to the Emergency Contacts tab, and there you will be able to view the available emergency contact information, such as the Name, Relationship, and Primary Contact Information.
For Employees
Overview
This guide shows you how to edit and add emergency contact information in Workday.
Before You Start
You will need to have the following information:
• Emergency Contact First and Last Name
• Emergency Contact’s phone number or email address
PROCESS
After logging into Workday, click the photo icon at the top right corner, as shown below, then click on the View Profile button.
Once you are on the employee profile, click on the Contact tab on the left-hand side of the screen.
On the Contact page, go to the Emergency Contacts tab, and then click on the Edit button to add or review your emergency contact information, such as the Name, Relationship, and Primary Contact Information.
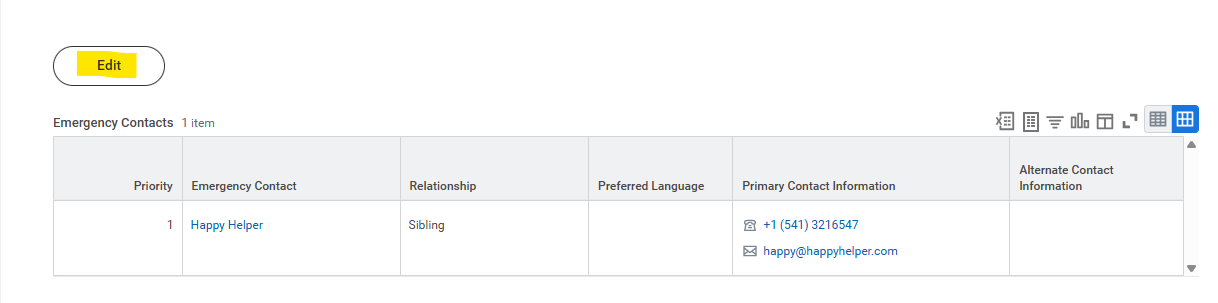
Your Emergency Contact Information will appear here. Use the pencil icon to edit existing information and Add buttons to add new information in each section section.
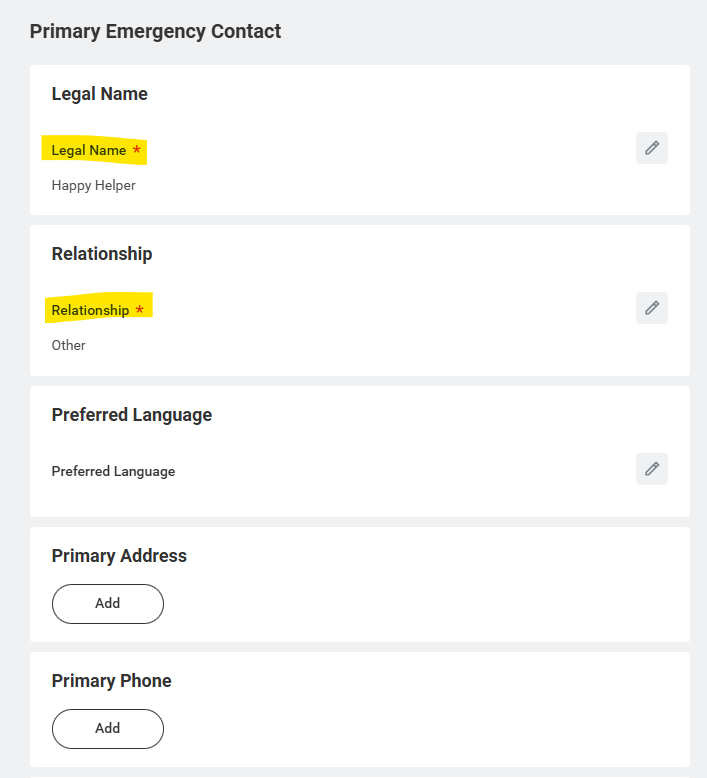
Once you have finished adding or changing information, click the Submit button at the bottom of the screen.
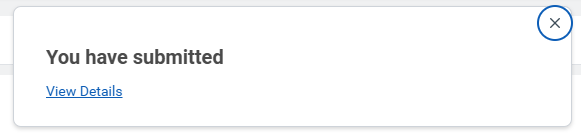
You should receive a message from Workday confirming your submission.
Change Work Space
Overview
This guide covers how the designated Building Manager, as defined by SOU Facilities, Management, and Planning, can Change Work Space in Workday for a building occupant. The Work Space involves a string of information that identifies the campus, building, floor, and room.
Before You Start
The Building Manager must be assigned to the Building Manager security role with permission given to access the Business Process Definition Change Work Location. To confirm this, 1) the Building Manager should verify they are listed on the SOU Facilities, Management, and Planning website. If they are not, please contact ppinput@sou.edu. Where the Building Manager is listed on the website but cannot access the Change Work Space task in Workday, they should, 2) contact Human Resources (hrs@sou.edu/541-552-8553) to be added to the security role.
You will need to have the following information to initiate a Change Work Space:
• Campus Location (Ashland or Medford)
• Building Name
• Floor Level
• Room Number
PROCESS
When a building occupant requires their work space to be updated, the Building Manager should proceed as follows:
- Change Work Space in the Workday search bar and select the Change Work Space Task.
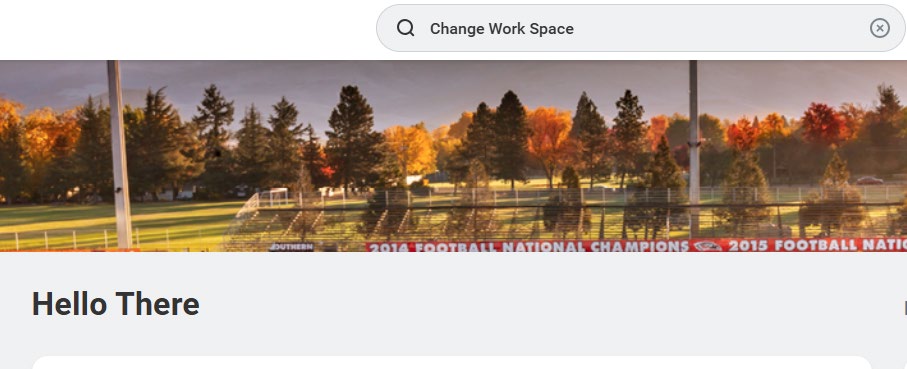
2. Type the name of the Worker who needs their work space updated.
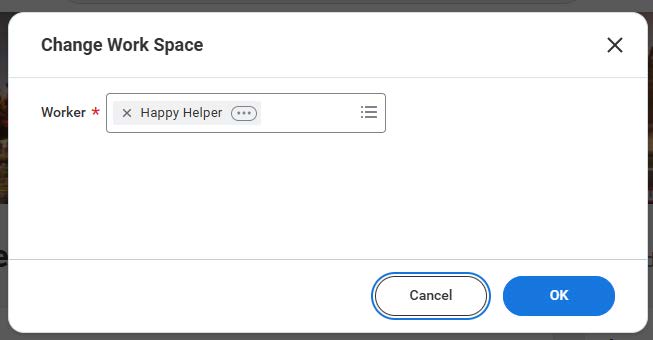
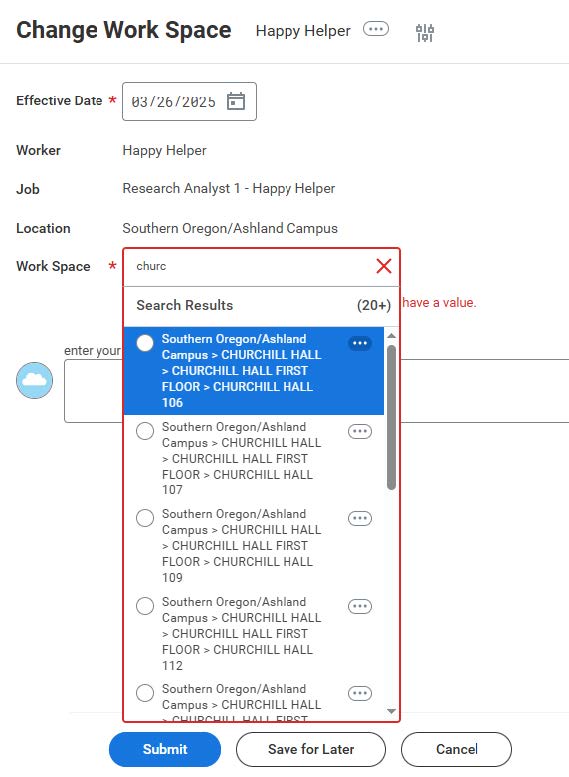
3. Enter and select the following information in the Change Work Space page. Where a Campus Location (Ashland or Medford), Building Name, Floor Level, or Room Number does not exist in the drop down, the Building Manager must Cancel out of the task and email ppintput@sou.edu the information so that it can be manually added to Workday.
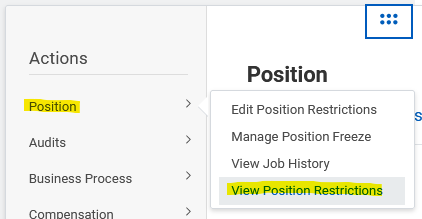
Under Actions, go to Positions, and then click on View Position Restrictions.
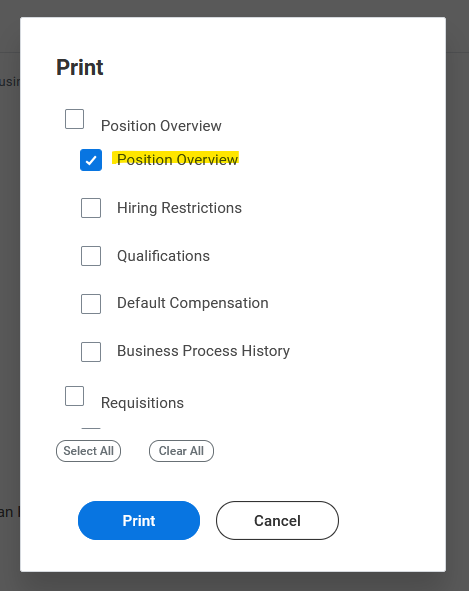
To download the position description, locate the PDF button on the right-hand side of the screen, click the Clear All button, and only select the Position Overview before printing.
Contact HR
Churchill Hall 159
1250 Siskiyou Boulevard
Ashland, OR 97520
Email: hrs@sou.edu
Phone: (541) 552-8553
Fax: (541) 552-8505
Hours: Monday-Friday, 8:00 a.m. – 5:00 p.m. [excluding university holidays]
Request an Appointment